


Decisions, decisions. After you’ve invested in a professional photography session, you’re faced with how to choose the right images for your walls. And choosing which images to keep and which to toss can be hard. Who are we kidding? It can be completely overwhelming. In fact, sometimes the plethora of choice leads to no decision at all.
We get it. Commitment is hard. When we go through photos with clients, they often put off a decision by saying they want to think about it and come back. But overthinking it just prolongs the process—and can even make you second-guess yourself later. Fortunately, here at Glean and Co., we have a favorite system for how to navigate the sea of thousands of digital images and narrow down which photos you truly love. With this method, you’ll be able to choose your favorite photos with confidence.
Why is it Important to Narrow Down Your Images?
Before we dive into our step-by-step guide though, you may be wondering, “Why is it so important to narrow down my pictures? Why shouldn’t I just keep them all?”
Culling your images is an important process. (Cull: Select from a large quantity. This is the word most photographers will use when helping you select your images.) This is true from a practical aspect, of course. If you’re working with a professional photographer, you’ll likely have a budget you need to stick with, which will limit the number of images you can choose. But it’s also true from a more emotional aspect. Narrowing down your photos can feel scary at first, because it means letting go of certain pictures. But letting go is simply a way to make room for better things. By trusting the process of culling your images, you’ll be rewarded by finding the images that truly bring you joy—and you’ll be able to display them in your home where you can enjoy them daily, rather than hoarding them away on a digital drive.
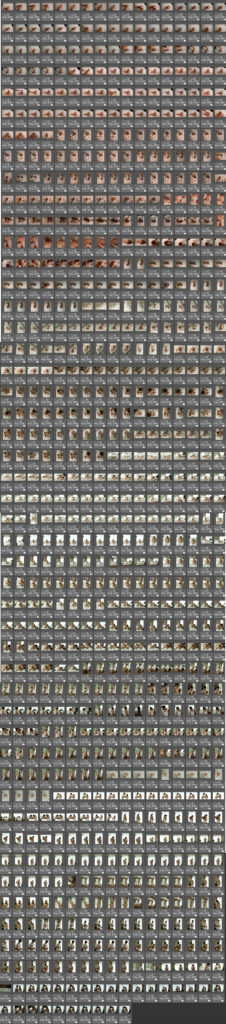
(See this image here –>? This is all 809 images I took during a recent newborn session. If you have this many images to sort through, how do you possibly find the best of the best? We pre-sort all of our clients images and only show 60-80 of the best.)
How to Cull Your Images: A Step by Step Guide for How to Choose the Right Images for Your Walls
Now that we know why it’s important to narrow down your images, here’s our system for how to choose the right photos for your home and family.
Step 1: The Viewing
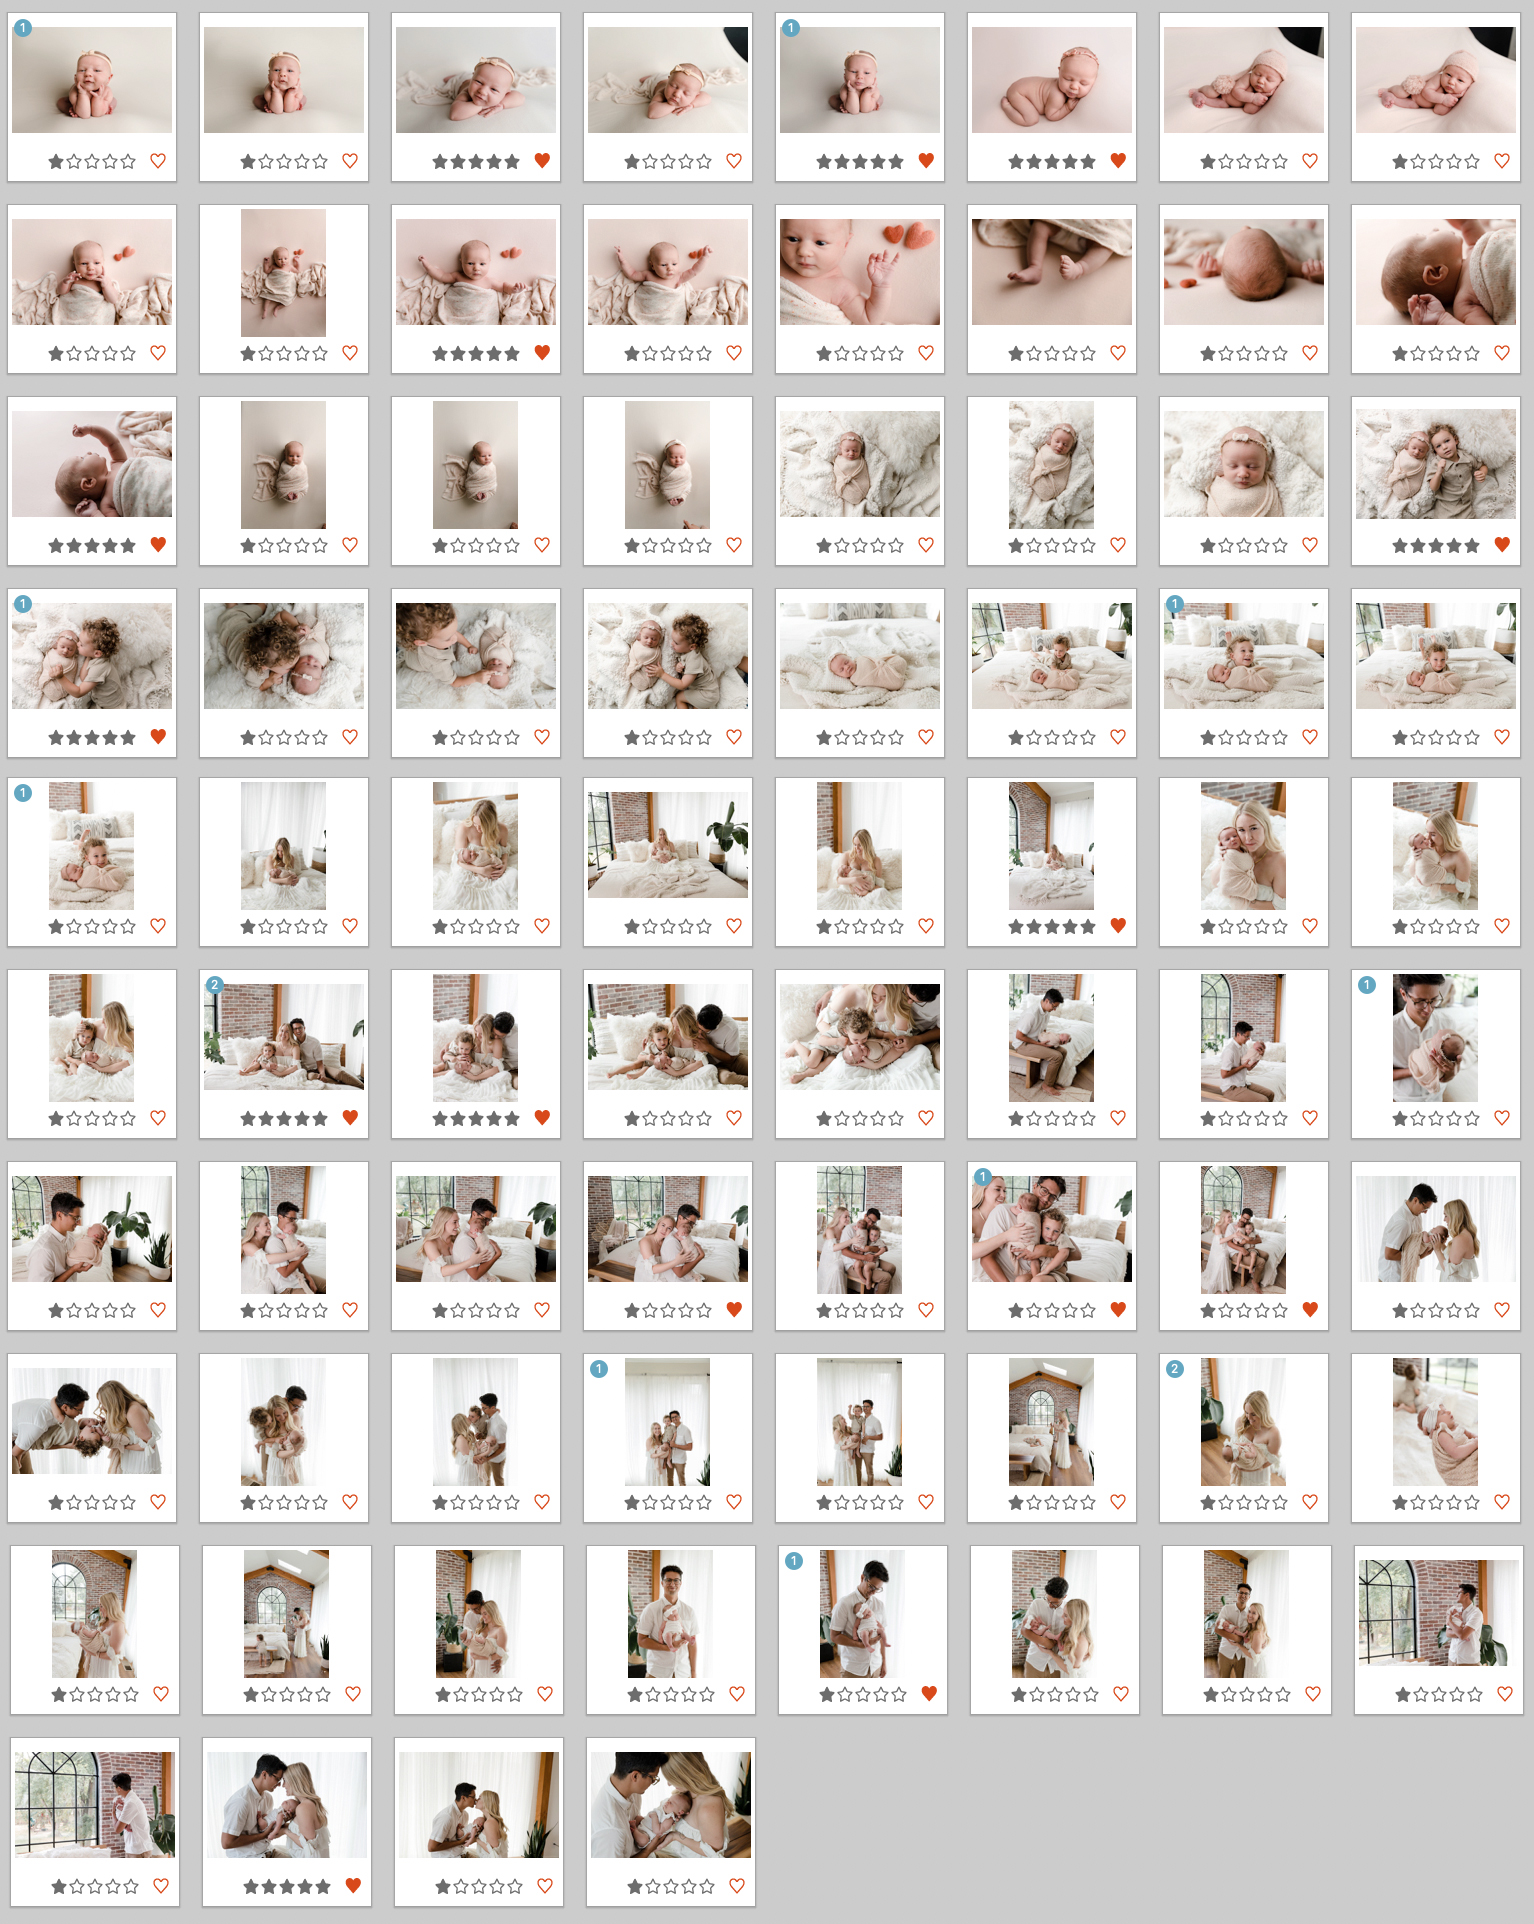
First, you’ll watch your slideshow of about 60-80 images from our session together. We always have a good song playing in the background to bring in all the feels.
Step 2: Yes, No, Maybe So?
Once you’ve seen the whole slideshow, we’ll go through all the images one by one. At this point, you’ll give each image a maybe or a no. It’s ok to have a lot of maybes right now, most people do. Just get rid of the for sure nos.
Step 3: Outtakes
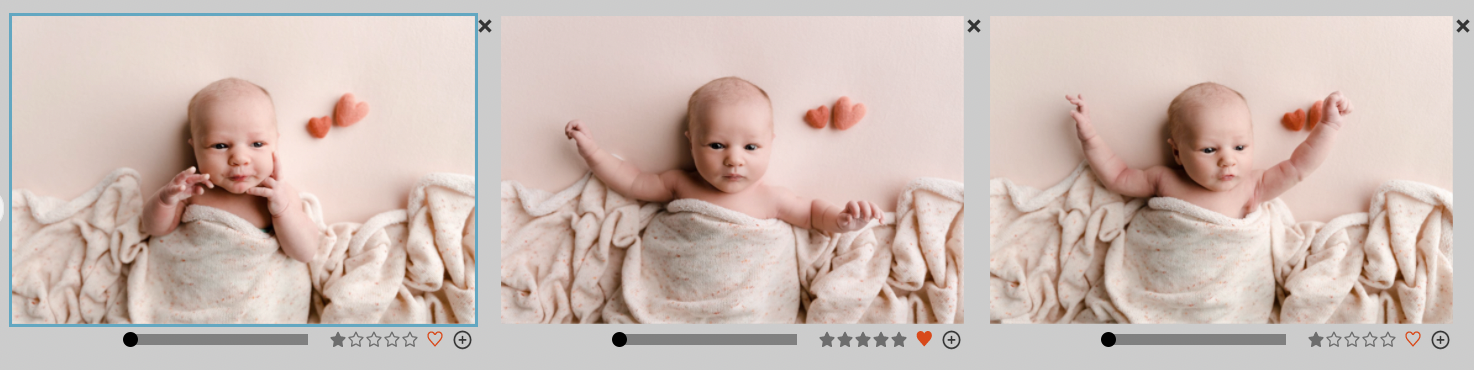
Go through anything similar (outtakes of each other with just slight variations) and look at all of the variations side by side. Which one is your favorite? Keep that one and ditch the rest. If they’re so similar that it’s hard to even see where there are differences, quickly choose one and move on. They’re
both great, so it doesn’t matter which one you go with.
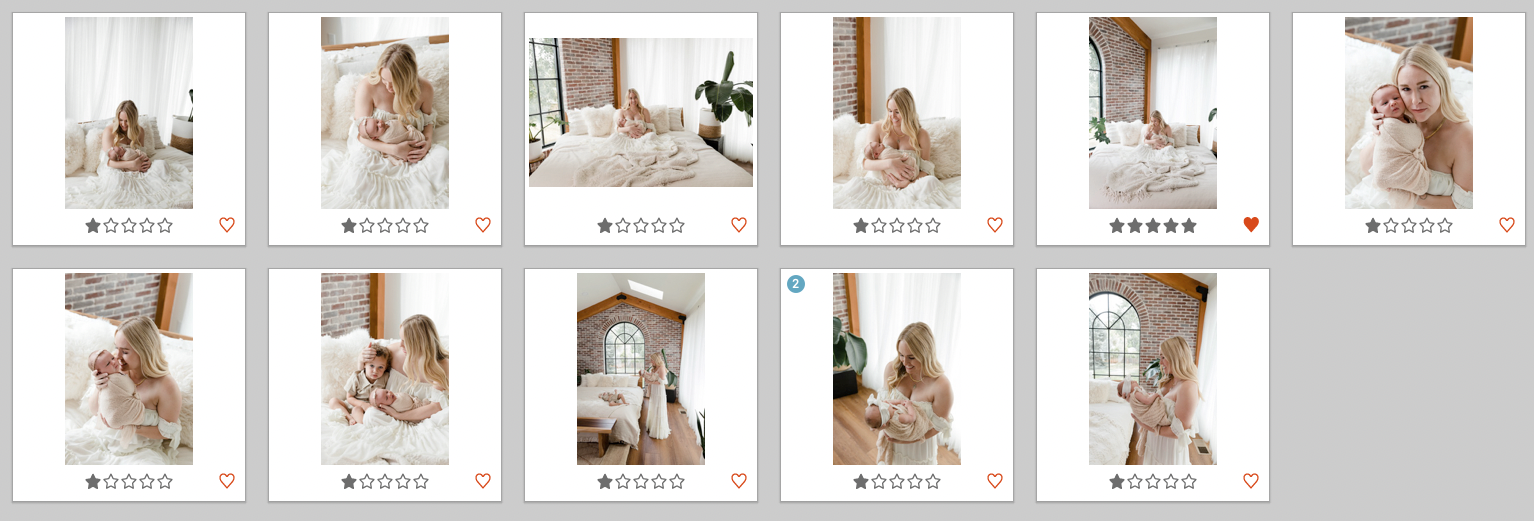
Step 4: Groupings
You should now have a gallery of images you love that are all different in some way. The next step is to group your images by who is in there. I often have categories like this:
- All Family
- Baby Only
- Baby + Siblings
- Sibling 1 Alone
- Sibling 2 Alone
- Dad + Kids
- Mom + Kids
- Mom + Dad + Baby
Now we’re getting to the really good stuff. The first 4 steps are to get rid of the clutter of extras that just overwhelm us. The following steps are not so much about eliminating images as choosing specific photos for specific purposes. Before you move on to further culling, make a quick list of what you
might want to do with these images. An example might be:
Wish List:
- Large family shot for the living room wall
- Family shot for the holiday card
- A smaller gallery with an individual image of each child and a sibling shot
- An album for the baby with all their tiny details
- Gift prints for grandparents
Now that we have our wish list, let’s look at the images again—in their categories—and figure out which shot is the right image for each item on your list.
Step 5: Family First
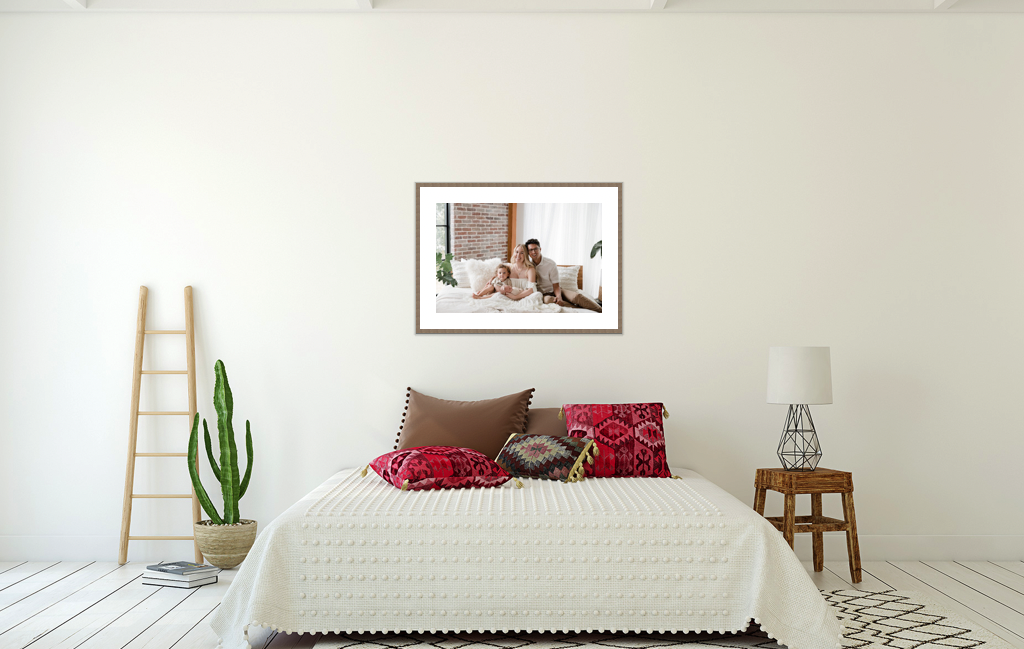
Always start with the whole family first. This image is going to be the one to go on holiday cards and more prominently on the wall. In a larger wall grouping the full family picture is almost always the big one in the middle and the star of the show. If you’re only choosing one image to stand alone on the wall, it is almost always the family shot.
Go through your family shots and bring up similar images within that group. Is there a picture of the family siting by the trees and another one where you’re also sitting by the river? Which one do you like better? Find similarities within these smaller groups and try to eliminate duplicates again.
How to decide between emotional/lifestyle and picture-perfect smile for the camera?
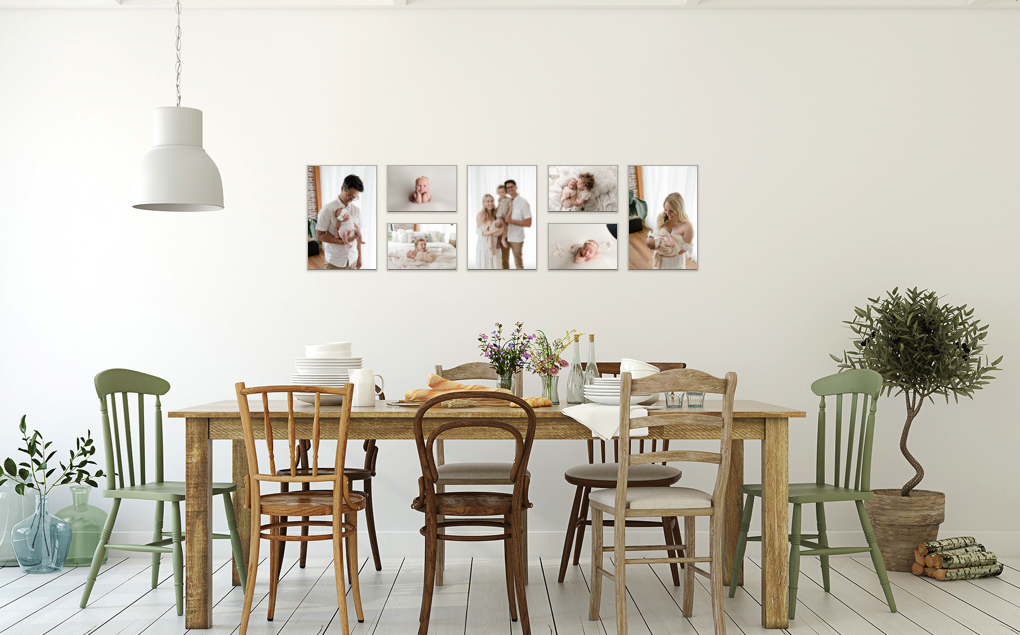
It all comes down to what brings you the most joy. If you end up with four family photos that you absolutely love, consider a larger gallery wall so you can incorporate more images than just one. Or put a couple on one wall and just one on another. It’s ok to have a lot of wall art up. We sure do here at Glean and Co!
Step 6: Fill the Rest of Your Wish List
Family shot for the wall, check. Now do the rest. Compare all of the images of Sibling 1 and choose your favorite. Compare all the images of Sibling 2 and choose your favorite. If these images will be going on the wall next to each other, look for similarities between the two so they feel cohesive.
Step 7: Commit
We know this is the hard part, but now it’s just a matter of do you really want these things or not. We’ve gone through all the images. We’ve compared and contrasted. And you’ve chosen the very best images—the ones you truly love. It’s time to put them on the wall.
You did it! Trust us, as hard as the process of choosing sometimes is, we know that there’s also something defining and precious about narrowing down your images. That one image you chose in your viewing session will become The Image that you will still think about and be able to picture in your mind’s eye for years to come, even if it’s no longer on your wall. It becomes the representative image of this moment in your life, this stage of your family’s journey together. And those kinds of images on the walls of your home are a source of joy and pride that you would never experience from a digital gallery or a collection of photos that’s too big to truly appreciate. Choosing the right images can be tough, but it is so worth it!
Feeling prepared now that you know how to choose the right images for your home? Then it’s time to book a consultation and create some beautiful images to choose from! We’d love to help you plan your session and decorate your home with personal, timeless wall art.


LEAVE A COMMENT
Comments