Are you looking for a solution to take your own DIY Newborn Photos? Or maybe you are a professional photographer who occasionally photographs newborns but not enough to warrant the cost of all the posing aids and props? Here are 4 inexpensive ways to create a “nest” for newborn photography.
I have to admit something- I am a total sucker for buying things that I think will help me save time or make things easier. I also watch a lot of Netflix in the middle of the night when I can’t sleep, so it’s a really good thing it’s 2020 and not 1989 or I would own all the infomercial mops and shake weights.
When it comes to buying studio props I tend to be the same way.
“That poser pillow means I can put ANY baby in a bucket and get the perfect shot?” “This background stand means I never have to photoshop out a wrinkly background EVER again????”
Sold! Here is my credit card. Some of these items really are game changers but a lot of the time what I really need to do is just spend some more time perfecting my technique before I run out and buy yet another thing. My money would be better spent hiring an assistant for an afternoon and working on the poses or concepts I’ve been struggling with on a real live baby. Or maybe watching some of those training videos I’ve purchased. Can you relate?
Check out these 4 options for creating a newborn “nest” that don’t require anything you can’t find in your own home or buy for just a couple dollars. Maybe you’re about to be a new mom and want to take newborn photos yourself or you are a professional newborn photographer and want to start including digital composites within your workflow, either way, here’s 4 newborn nests on the cheap. (To read more about a professional newborn session with Glean and Co, go here!)

Want to learn more about taking your own newborn photos? Head over to visit our photo academy at www.gleanphotography.com
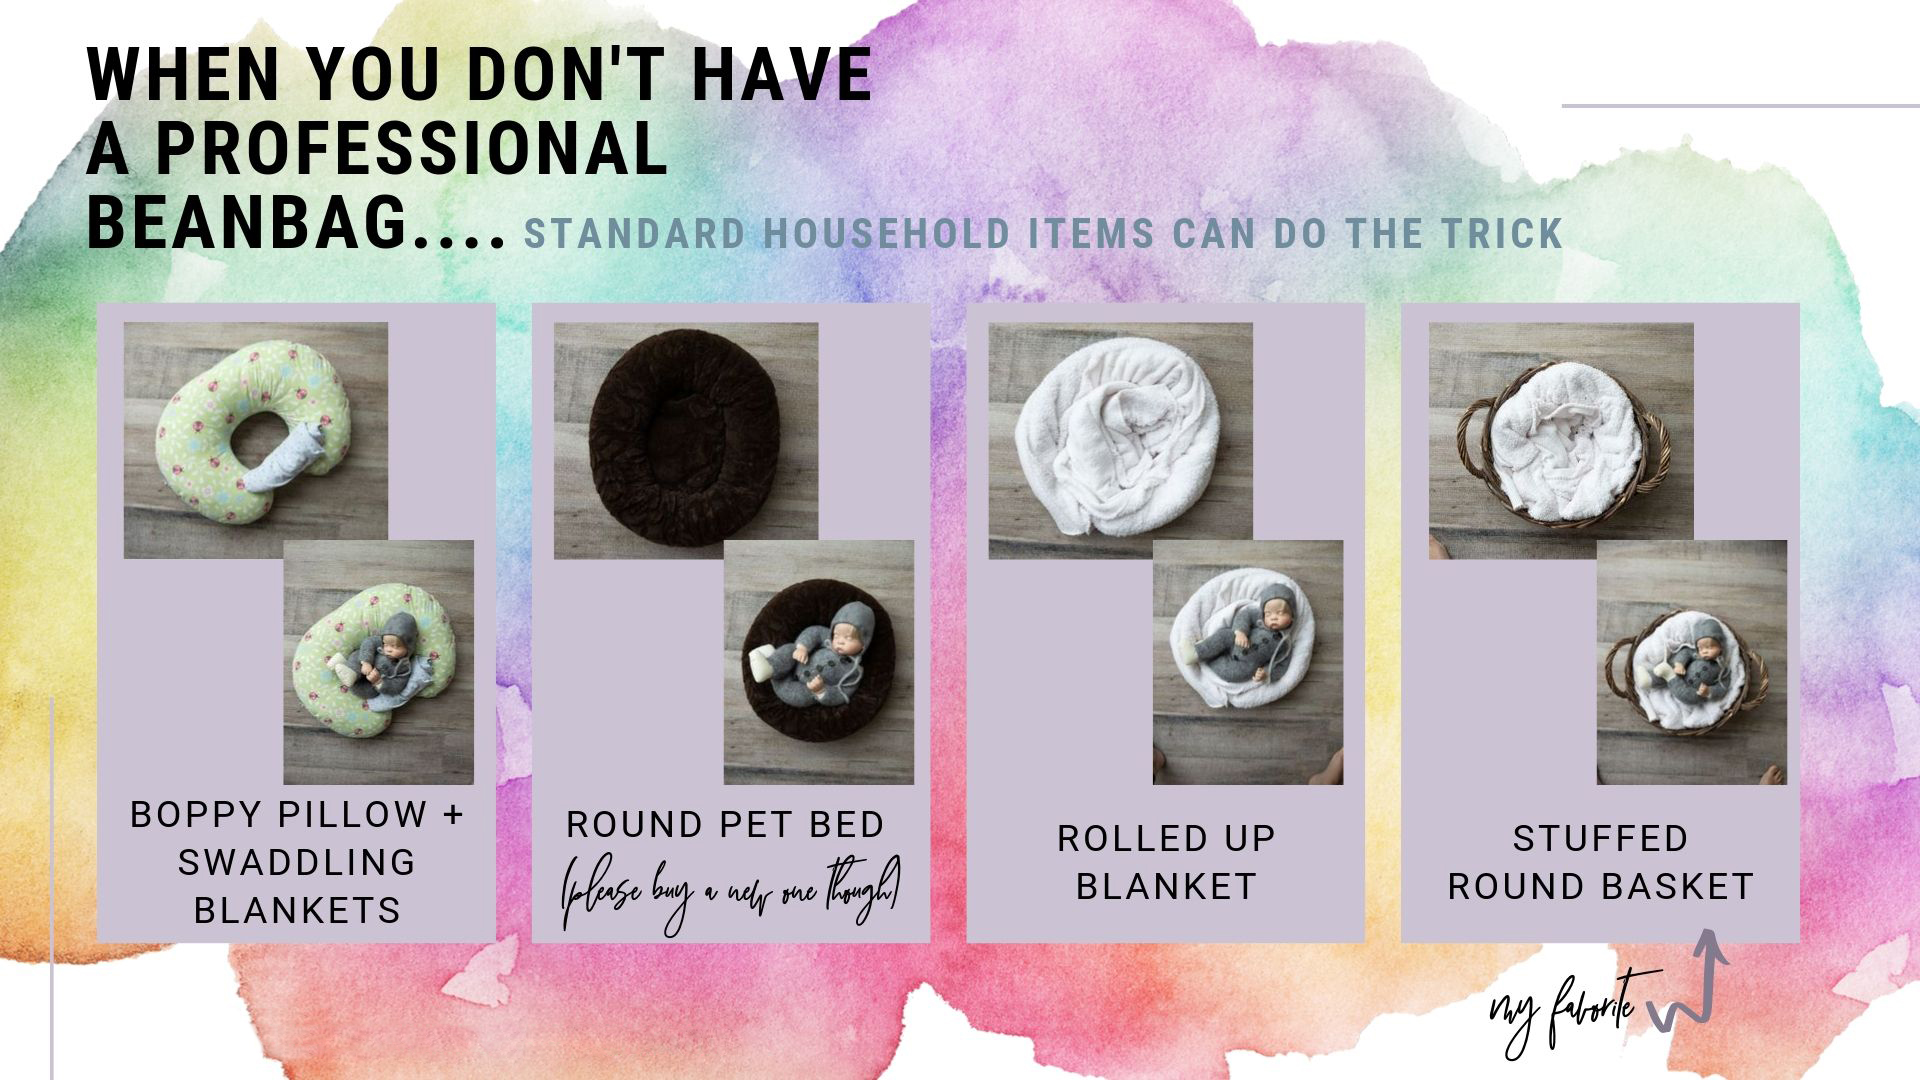
Option 1: Grab your Boppy Pillow and some swaddling blankets
- Place the Boppy at an angle and set your baby down in the well. Use rolled up swaddling blankets or towels to support baby’s bum at the opening of the pillow if necessary to keep them in place.
Option 2: A (NEW) Round Pet Bed
- Now I’m not suggesting you go grab your dog’s nasty bed and place your newborn in it, but places like TJ Maxx or Tuesday Morning often have shallow round pet beds for just a couple dollars. Look for one that is preferably a solid color, like this dark brown, and that has a slightly raised edge so the baby has a middle area to sink their body into.
Option 3: A Rolled up Blanket (Fleece works great!)
- Lay your blanket out on the ground and then roll it into a long tube. Swirl it around itself creating a round shape with a lower middle than the edges.
- Place your baby into the round middle, adjusting the sides to be lower or higher depending on baby’s size and where they need support.
Option 4: Combine option 2 or 3 with a round basket (my favorite!)
- This is the option I opt for when I’m photographing a newborn and I don’t have all my usual gear on hand. The edge of the basket adds extra support to help hold baby in position so you can get that perfect pose.
- Look for a basket that is at least the length of your forearm to ensure your newborn baby will fit. For older babies you’ll want it even larger.
- Fill the basket with either your new pet bed or that same rolled up blanket. I usually have one side of my basket that is filled just a little bit higher where their head will go so that their feet are always lower than their face.
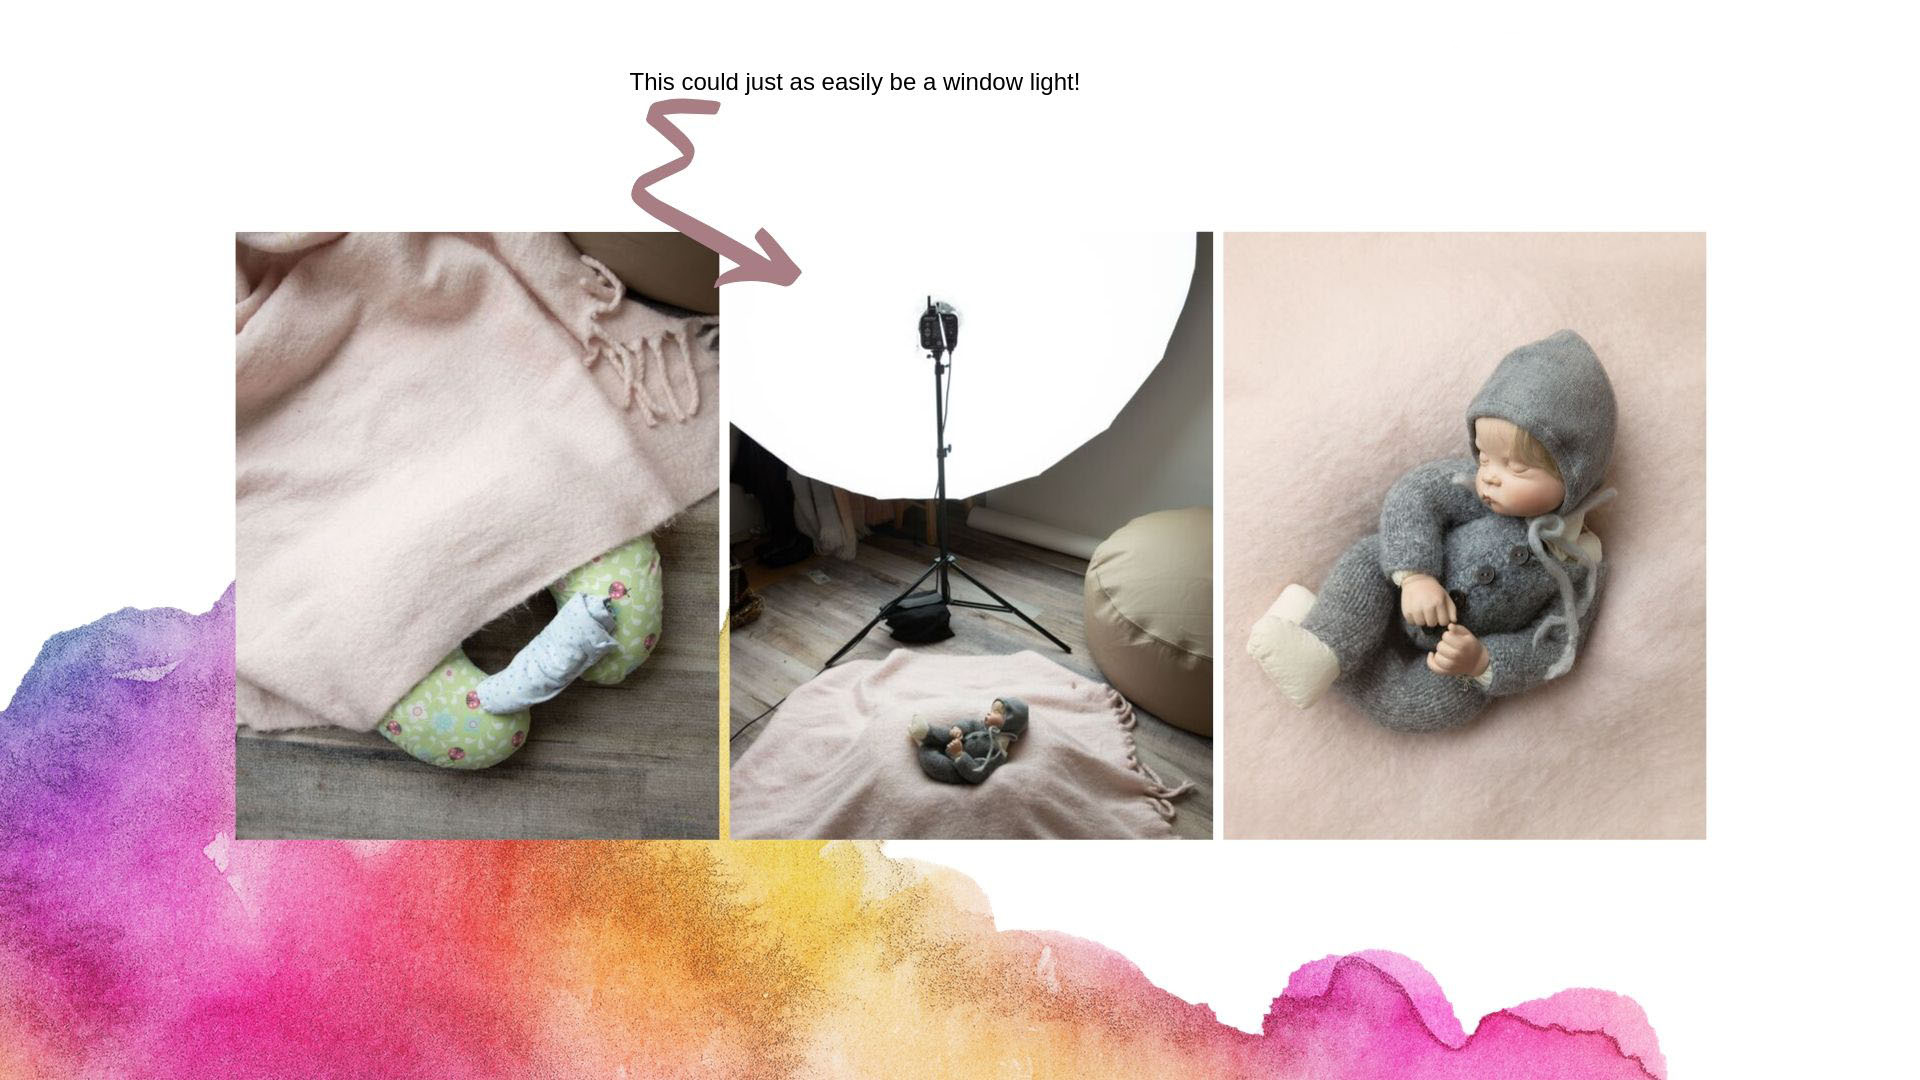
Once you have your nest built you have a couple options- you can cover the entire thing with a blanket that you actually want in the image, or you can cover it with a white or brown fleece fabric with the intention of compositing the baby into another background entirely. For more information on compositing, download our entire FREE guide on shooting for composites.
Here’s how Option 1 would look covered up with a wool blanket!
For more information on photographing new babies plus free guides and fun tips and tricks, head over to www.gleanphotography.com

LEAVE A COMMENT
Comments